Welcome to the intriguing world of Linux headless servers and SSH terminals. In this article, I'll explore the concept of headless servers and their benefits. Plus, I’ll unravel the mysteries of connecting to them, effortlessly transferring files, and exploring some essential Linux commands.
What is a Linux Headless Server?
As an Industrial Programmer, I often run into instances where a client has hosted their Ignition Gateway on a Linux Headless Server. A Linux Headless Server is a computer that runs a Linux OS distribution but does not have a keyboard, mouse, or monitor connected to it. By going headless, you can save on unnecessary peripherals and cut costs. A prime example of a headless Linux server is the versatile Raspberry Pi.
Connecting to a Linux Headless Server
Now, you might be wondering, "How in the world do I connect to a computer without a keyboard, monitor, or mouse?" The answer is by harnessing the power of SSH (Secure Shell or Secure Socket Shell). SSH is a network protocol that gives users a secure way to connect remotely and execute commands.
There are various methods to connect to a headless Linux server. Here, I’ll focus on just one specific approach: PuTTY and WinSCP. Both are free-to-use programs that are extremely helpful when you need to either run a command (PuTTY) or send/download files from the server (WinSCP).
PuTTY
PuTTY acts as a gateway to connect to SSH-enabled Linux servers and run commands through a terminal. To get started, download and install PuTTY from their website. Once installed, launch the application, and you'll be greeted by a user-friendly interface.
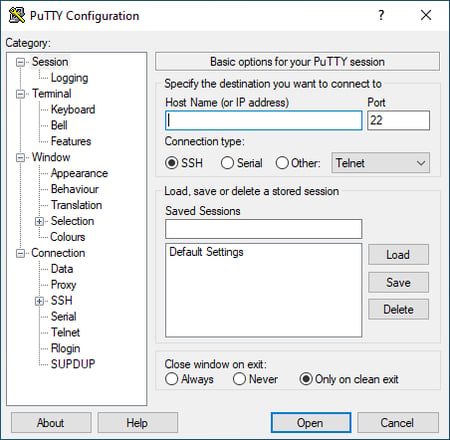
To establish a connection, you'll need the hostname (or IP address) and port number of the server you want to access. The port value may need to be changed, but by default Linux uses port 22 for SSH. PuTTY also offers a handy “Saved Sessions” feature, allowing you to store configurations for easy future use. Simply load a saved session, and the hostname and port will be populated automatically.
Once you've entered the required details, click the "Open" button.
Now, you'll find yourself facing a blank terminal.
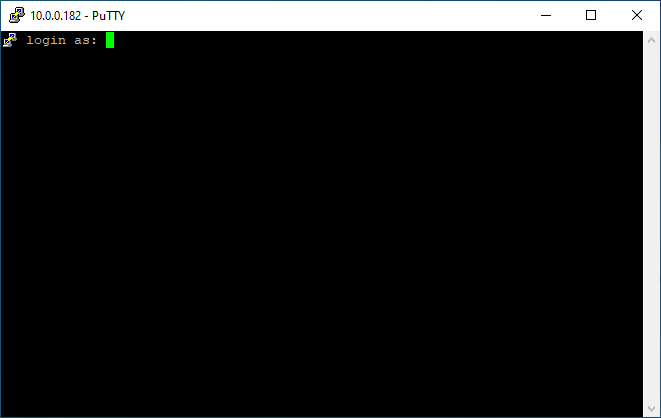
When prompted, enter your username and password. When typing in your password, it will appear as if nothing is happening. Don't worry - PuTTY doesn’t display asterisks or characters while typing passwords but does securely record your keystrokes. With that in mind, if you make a mistake, simply hold the backspace key to erase the entire input.
Once you've typed your password, press enter.
Congratulations, you've breached the system like a true hackerman!

WinSCP
WinSCP enables users to send or download files from the server. This can be extremely useful if you need to send an updated version of Ignition to the server, or if you need to get logs or a gwbk from the server. To start using WinSCP, download and install it from the official website. Then launch the application to begin file transferring.
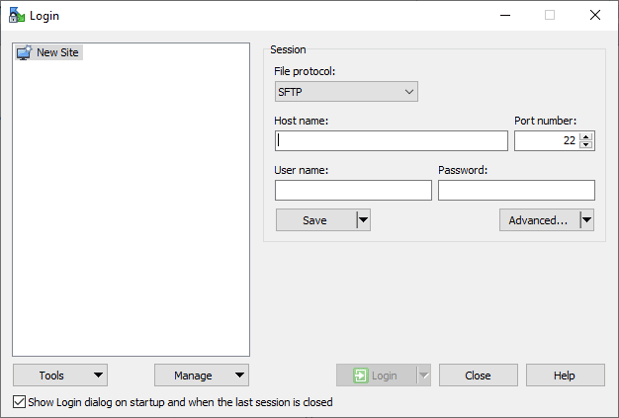
Similar to PuTTY, WinSCP requires the host name/IP address and port number of your target server. Once entered, you can click on 'Save' to save the IP Address/Host Name as a site. This means that on subsequent openings of WinSCP, your site should appear on the left-hand side under 'New Site', allowing you to load the IP address configuration. The session-saving and loading options further enhance the user experience, sparing you the hassle of remembering host details each time.
Next, you'll want to enter your Linux username and password into the text fields and press 'Login'.
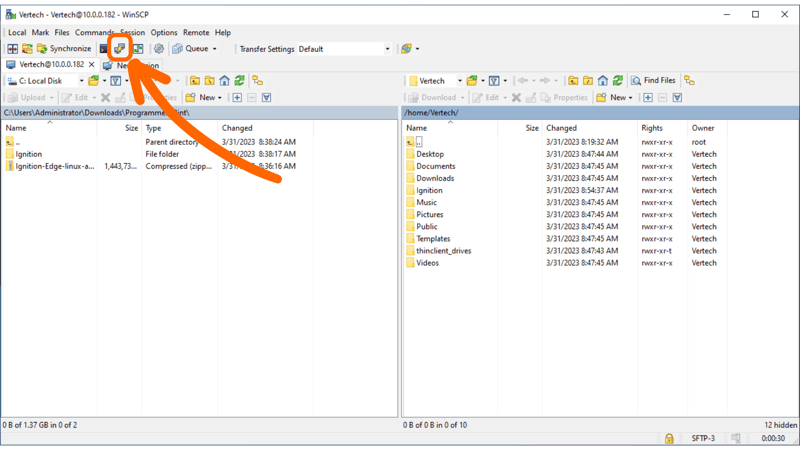
Once logged in, WinSCP presents a split-screen interface.
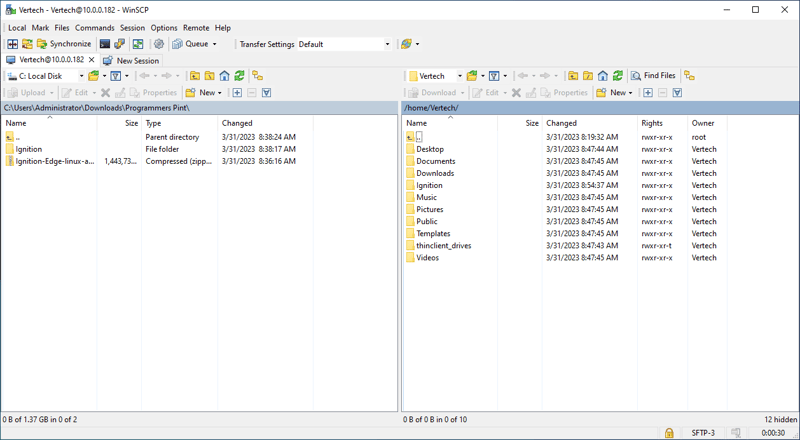
Your local machine appears on the left side, while the connected headless server is displayed on the right. Transferring files becomes a breeze with simple drag-and-drop functionality. To download a file from the server, locate it and drag it from right to left. Conversely, uploading files involves selecting the desired file from your local machine and dragging it from left to right.
NOTE: WinSCP has a built-in button that will open a PuTTY session to the server you're connected to using the login information you provided on original connection.
Essential Linux Commands
Now that you're connected, let's review some essential Linux commands to get you started.
Sudo
When it comes to executing commands with superuser privileges, "sudo" is your go-to prefix. Many critical actions, such as removing files or creating directories, require superuser permissions. The IT department responsible for configuring the Linux server will grant these privileges to specific user accounts. Remember, it's not something you can grant yourself by default.
CD and LS
To traverse the Linux file system, use the "cd" (change directory) and "ls" (list) commands. The "ls" command lists all files and directories within the current directory. The "cd" command allows you to change your current directory.
For example, to move into a folder named "ignition," you would type "cd ignition." To move up one level, simply type "cd ..". These commands help you explore different directories, find files, and execute specific commands.
MKDIR and RM
To create a new directory, use the "mkdir" command followed by the desired directory name. Conversely, the "rm" command removes files. For instance, if you want to create a directory named "control_freaks," type "mkdir control_freaks." To delete a file, use "rm" followed by the file name.
PWD
Sometimes, it's helpful to know your current working directory. That's where the "pwd" (print working directory) command comes in to play. Simply type "pwd" and it will display the file path of your current location.
Feel free to explore more commands as you traverse the Linux landscape. I recommend checking out The 40 Most-Used Linux Commands You Should Know by Kinsta. But the possibilities are endless - Linux is your digital playground!
Thank you for braving the world of Linux headless servers and SSH terminals with me! Armed with PuTTY and WinSCP, you can now connect to headless servers, transfer files with ease, and harness the power of essential Linux commands. So go forth, explore, and let your inner hackerman thrive!





Comments